How to Install Vinyl Lattice, Part 2
 In the previous article we shared lattice installation suggestions and shared photos of each installation type. We’ll do the same today, but first, we have a couple more suggestions for you.
- In any lattice project, the lattice must be attached to a self-supporting structure or frame.
- Two: make sure you support your lattice sheet every 4’.
- If you are using lattice as a pergola roof or ceiling project, you should support the lattice every 16” or less.
Installation Examples: Fencing
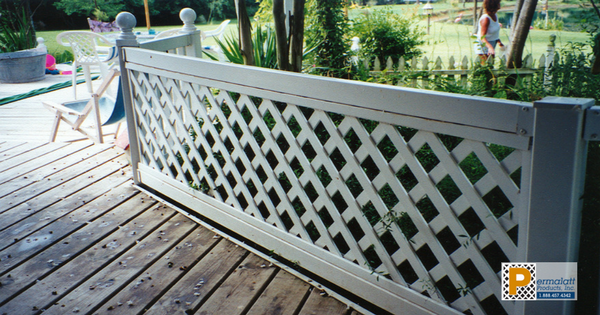
Alright, the next installation example is for lattice fencing.
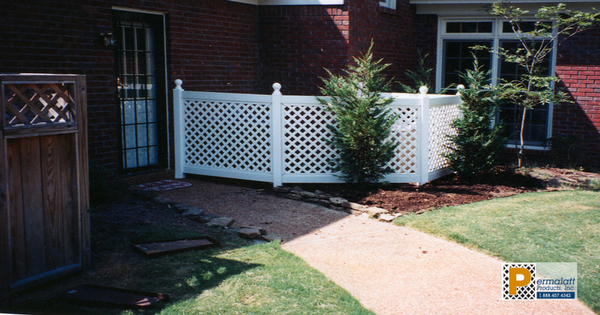 You will follow the installation directions for the fence post and rails in this type of project. In the photo above you will see our customer used the u-channel around the entire lattice sheet. Then the lattice and channel were screwed in to the post and rails to keep it secure and aligned. If you read the previous article, Installation of Lattice Part 1, you’ll see another method of installation in the “adding a privacy fence to your deck” section.
Installation Examples: Railing
The next installation example is for railing.
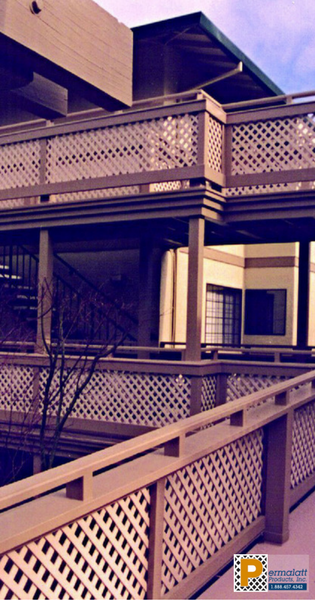
In the picture above the lattice is secured to wooden fence rails. The lattice is sheet is framed on both sides by the boards. The lattice is nailed to wooden frame. Then the top and the bottom of the lattice frame were screwed to the top flat rail and post.
The photo above shows the use of our u-channel along the post and rails securing and supporting the lattice sheet on the railing and post.
We’re not done yet. Here is one more installation we get questions about: Using lattice as a ceiling.
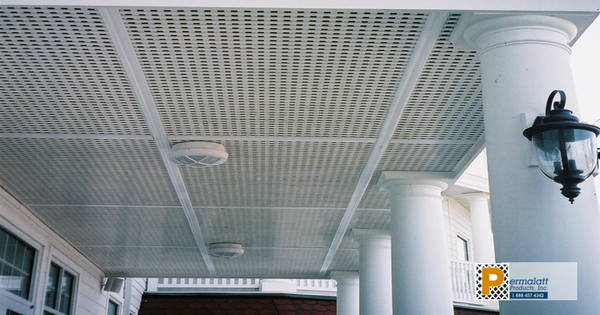 In the project shown above, the 4’x 8’ lattice sheet is joined with the h-channel. The outer edge and building side edges are capped off with the u-channel. In this project the lattice sheet was nailed to the rafters every 12”. The h-channel is screwed to the rafter. The lattice sheet is into the channel 1” on each side.
Since the lattice sheet is secured every 12”, and in the channel 1”, the customer did not screw the lattice sheet into the channel. However, you can also secure the lattice at the channel as well.
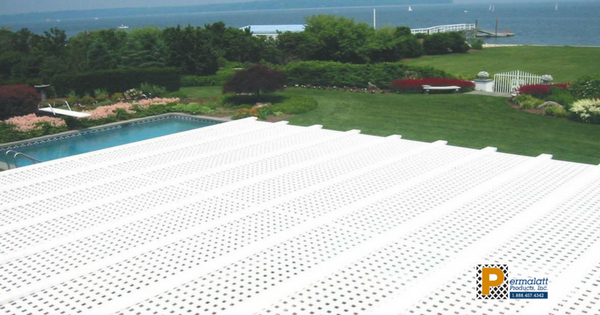
The picture above is the top of a pergola. The lattice sheets are 4’x 8’. As you can see, the customer used wood over each rafter to secure the lattice sheet. A screw through the wood into the rafter and it’s all set. The h-channel in used to connect the lattice on the 8’ side.
There are many ideas on what will work for lattice installation. If you’re just not sure, contact us. www.permalatt.com or 888-457-4342. Don’t miss the opportunity to check out our other articles. From the most common lattice uses to the unique use, we share it all.